How to Choose a Whole House Water Filter: Stages, Flow Rate and Certifications
A whole house water filter treats every drop that enters your home, from the kitchen tap to the shower to the washing machine. Choosing one comes down to four questions: what is in your water, what each filter stage does, how much water your home uses at once, and which certifications to trust.
Step 1: Know your water
Start with what you are filtering. If you are on public water, your utility publishes an annual water quality report, also called a Consumer Confidence Report. It lists your water sources, the disinfectant used and every contaminant detected. If you are on a private well or rainwater catchment, a lab test is the only way to know.
Look for three things in your report or test:
- Disinfectant: chlorine or chloramine. This decides the type of carbon you need.
- Sediment and turbidity: common with surface water and after storms.
- Specific contaminants: lead, VOCs, agricultural chemicals or anything above your comfort level.
If you live on Maui, our Maui tap water guide explains where your water comes from.
Step 2: Understand the stages
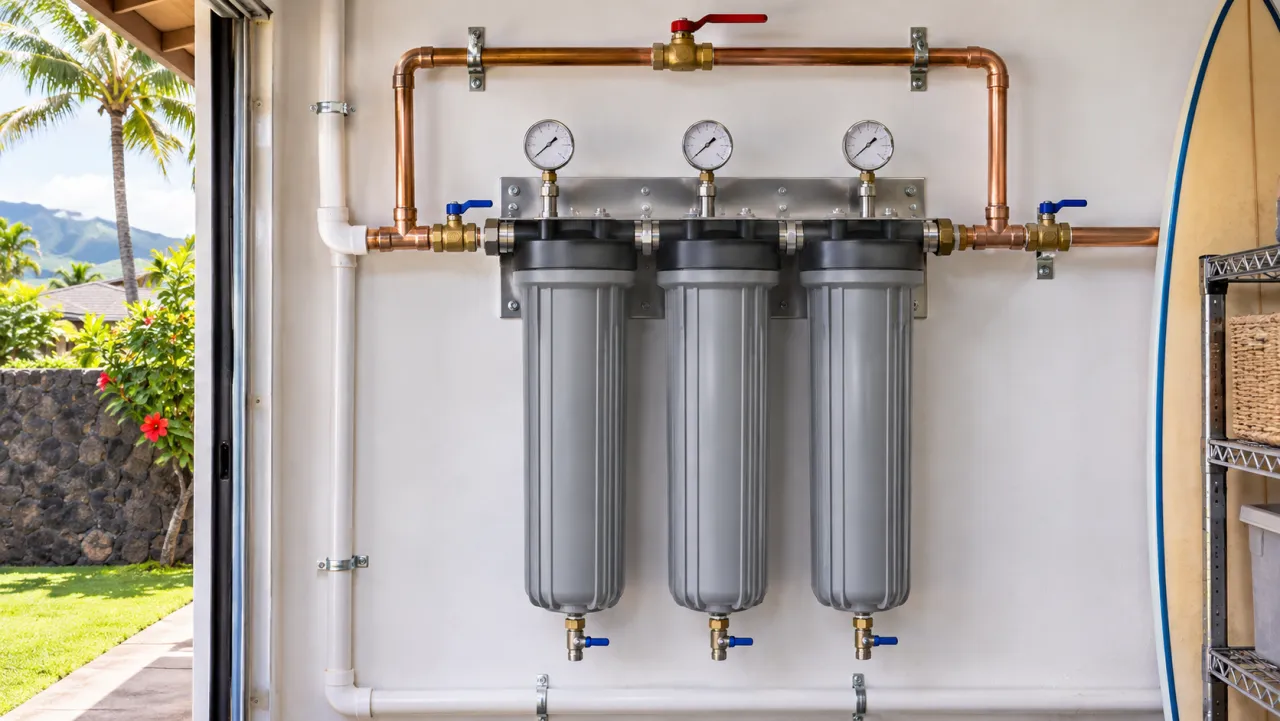
Most whole house systems use two or three cartridges in a row. Each one has a job.
Sediment
The first stage catches sand, silt, rust and scale. Sediment cartridges are rated in microns. A 20 or 5 micron cartridge is typical for whole house use. Finer is not always better: a 1 micron cartridge at the point of entry clogs fast and drops your water pressure. The sediment stage also protects the stages after it, so they last longer.
Carbon
Activated carbon is the core of most systems. It reduces chlorine, bad taste and odor, and with the right certification it also reduces VOCs and many chemicals. There are two common forms:
- Granular activated carbon (GAC) has loose granules and good flow.
- Carbon block is denser, so it filters finer and gives water more contact time.
If your water has chloramine instead of chlorine, choose catalytic carbon. Regular carbon removes chloramine slowly. Catalytic carbon is made for it.
The third stage
A third housing gives you room to match your water. Common choices are a second carbon cartridge for more contact time, a finer sediment cartridge for water with a lot of particles, or a specialty media for a specific contaminant in your test results.
Step 3: Size it for your home
A filter that is too small for your home will cost you water pressure. Two numbers matter.
Flow rate. This is how many gallons per minute (GPM) the system can deliver. A modern shower head uses about 2 to 2.5 GPM, and a washing machine or dishwasher adds more. A family home can easily need 8 to 12 GPM at peak. A whole house system rated around 15 GPM leaves headroom.
Housing and connection size. Big 20-inch housings with a 4.5-inch diameter hold much more media than standard 10-inch ones, so they flow better and last longer between changes. Connections of 1 inch keep pressure up across the house. Small 3/4-inch connections and 10-inch housings work for apartments but often feel weak in a full home.
Step 4: Check the certifications
Certifications tell you a product was tested by an independent lab. The ones that matter for water filters are NSF/ANSI standards:
- NSF/ANSI 42: aesthetic effects, such as chlorine, taste, odor and particulates.
- NSF/ANSI 53: health effects, such as lead, VOCs and cysts.
- NSF/ANSI 401: emerging contaminants, such as some pharmaceuticals and pesticides.
- NSF/ANSI 61: the materials are safe in contact with drinking water.
- NSF/ANSI 372: the parts that touch water are lead free.
In Canada and much of North America, CSA B483.1 covers drinking water treatment systems.
One detail many buyers miss: the housing and the cartridges are certified separately. Housing certifications such as NSF/ANSI 61 and 372 tell you the system is safe and well built. Cartridge certifications such as NSF/ANSI 42 and 53 tell you what the filter actually removes. Check both.
Step 5: Plan for maintenance
A filter only works while its cartridges are fresh. Features that make maintenance easy are worth paying for.
Pressure gauges. A gauge before and after the filters shows the pressure drop across the system. When the difference grows by about 10 PSI over what it was with fresh cartridges, a cartridge is clogging. Gauges take the guesswork out of when to change.
Drain valves. A drain at the bottom of each housing lets you empty it before opening, so changes are clean and fast.
Bypass valve. A bypass keeps water running to the house while you service the filters.
Typical change intervals. Sediment cartridges often last 3 to 6 months and carbon cartridges 6 to 12 months, depending on your water and how much you use. Follow the manufacturer and your gauges, whichever says change first. When you change cartridges, rinse the housing and check the o-rings, and replace any that are flattened or cracked.
Step 6: Installation basics
Whole house filters go at the point of entry, after the main shut-off and before the water heater. Mount the system on a wall with room below to remove the housings. Keep it out of direct sun, because UV light breaks down plastic housings over time. Install shut-off valves on both sides and a bypass, and stay within the system’s rated pressure and temperature range.
The short version
For most homes on public water, a good whole house system has three stages (sediment, carbon and one matched to your water), 20-inch housings with 1-inch connections, about 15 GPM of flow, pressure gauges, drain valves, and certified housings and cartridges.
The SILVATTI FILTRI checks every one of those boxes: three 20-inch housings, 1-inch NPT connections, 15 GPM, four pressure gauges and three drain kits, with housings certified to NSF/ANSI 42, 61 and 372 and CSA B483.1. It is available in gray or blue.
Have a water report or test results? Send them to us and we will recommend the right cartridges for your home.
Published November 9, 2026
Back to Blog